Troubleshooting Sourdough: Your How to Guide!
Need help troubleshooting sourdough? No problem. I’ve taught several sourdough classes within my community over the last few years, and I’ve been making sourdough for seven years.
Did you know that most problems with sourdough bread are actually due to the starter? Let’s start there.
Troubleshooting Sourdough Starter
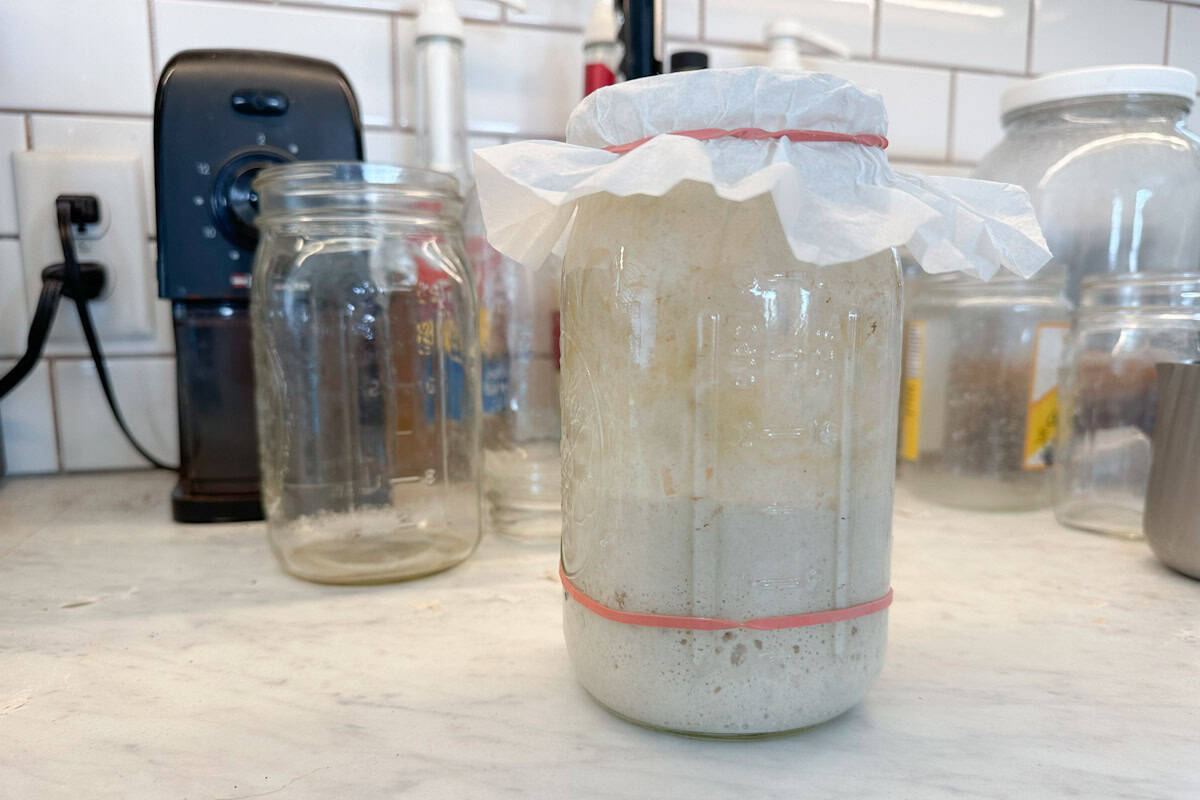
My sourdough starter separated, there’s a brown-ish (or sometimes black) water on top. Do I toss it?
Short answer: no, don’t toss it. Mold is the only reason to completely toss a starter.
The liquid you see on top is called a hooch, and it means your starter is hungry– the darker the liquid the more hungry it is. All you need to do is drain it off and feed like normal. You’re looking for a pancake batter consistency. You may need to add extra water in, because of the water you poured off. Also, don’t be surprised if it takes a couple of feeds to revive it to its bubbly state.
My bread dough didn’t rise well, and when I baked it it was super dense. My starter was bubbly! What went wrong?
When troubleshooting sourdough, it can be hard to pinpoint where the error is. In this case, it sounds likely that your starter wasn’t strong enough. I hear this a lot from people who have made their own starter from scratch. All it means is that the wild yeasts were not strong enough to cause your bread to rise. This is fixable!
Sourdough really thrives when fed ratios higher than 1:1:1. So this is what I would have you adjust first!
Try one of the below:
- take a small amount of starter (1 tsp, is fine!) and feed it 1:10:10. After six hours, I would take some off it, put that discard in your fridge, and repeat the feed of 1:10:10.
- try feeding a minimum ratio of 1:3:3 2-3 times before mixing up bread dough
- switch up flours and feed using a whole wheat or rye flour. The nutrients found in these can give your starter a boost.
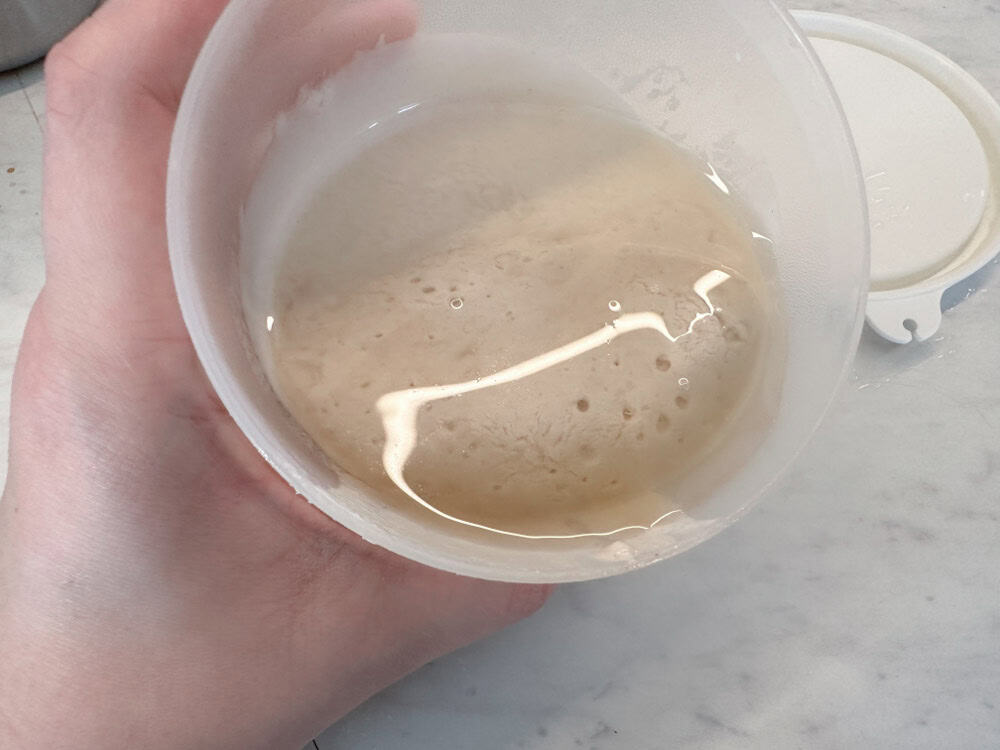
My starter is really watery and the bubbles on top are frothy. What do I do?
You need to either pull back on the water at the next feeding or add some extra flour until you see the thick pancake consistency again. You’ll probably have noticed the sourdough isn’t doubling either. If you want to be precise, get out a kitchen scale, pull out 1-2 TBSP of it, and feed it by weight in equal parts (1:1:1). Water is heavier than flour and it can be easy to add too much. It should bounce back within 2-3 feeds.
My starter isn’t rising at all. I don’t know what happened!
My first question is, what temperature is your house? Sourdough prefers 75-80 degrees Fahrenheit. I can still successfully make bread with my home at/around 70 degrees in the winter. It just takes a little longer for it to double. You can try feeding it with warm water, but be mindful it isn’t too warm. Anything over 120 degrees can harm the yeast.
My second question is, what did you feed it? If there’s a chance you gave it bleached flour, or tap water contaminated with chlorine, it’s possible you killed it and will need to start over.
I forgot to feed my sourdough starter, is it okay?
If you let it on the counter too long what can happen is it becomes so hungry it can change the PH and may allow bad bacteria to take over. So, I would go by looks. Is there any mold growing? Any discoloration? I’ve had the top go crusty on me before but this is fine. Sourdough starter is very forgiving! Assuming it looks and smells okay (at this point it would smell sour not sweet), I would remove a small amount (1 tsp or up to 1 tbsp) to feed and move the rest into the fridge.
If you want a break, after feeding that small amount a high ratio to rebalance the PH, mark it and move it to the fridge as well.
Troubleshooting Sourdough Bread
Now we’ve covered sourdough starter problems, let’s explore how to fix your bread.
My loaf is too dense and doughy. What happened?
As discussed earlier, it is likely it didn’t proof or rise enough. The problem is the sourdough starter. See the troubleshooting sourdough starter section.
The artisan loaf I baked is super crusty and tough on the bottom. How do I fix this?
This is tricky. I personally do not bake a lot of artisan loaves, because they are not my family’s preference. There are a couple of factors that go into a crusty, tough bottom, including but not limited to: dough fermentation, hydration, and oven temperature. It will take trial and error to correct this.
First we’ll cover dough fermentation.
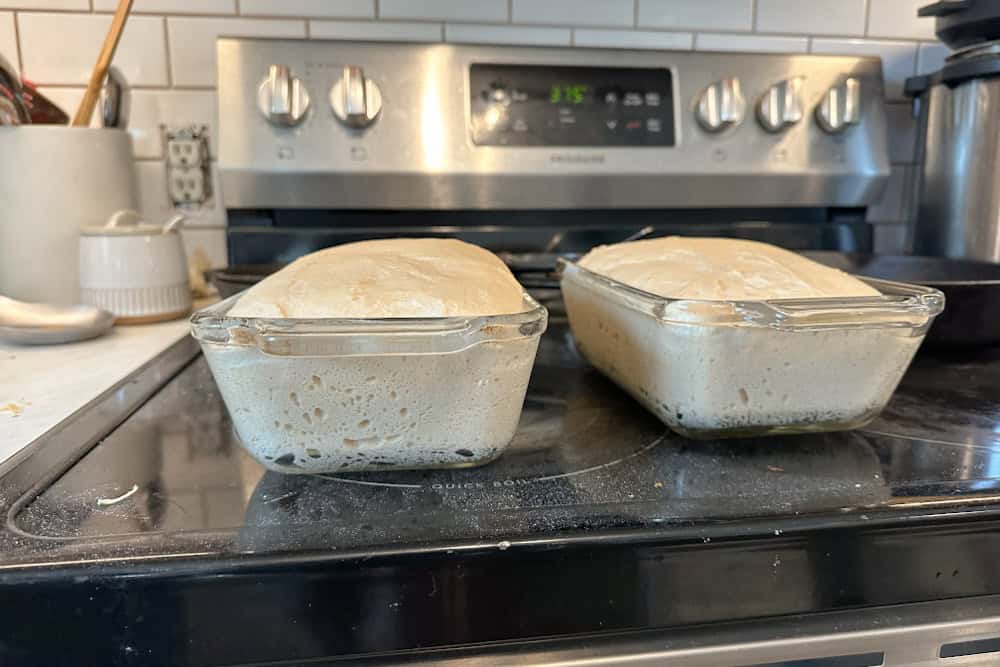
This is referring to how long your loaf has proofed. Under-proofed, and your crust is likely to be pale and lack flavor. Over-proofed and it will be hard and crusty. Your dough will ferment according to the temperature of your house. In the summer, you may find it proofs more quickly and likewise more slowly in the winter.
In the coldest part of our winter, I will leverage my oven to proof my dough. I turn it on and stand there (or else I will forget) for a few minutes while the oven begins to heat. I’m looking for 80-90 degrees Fahrenheit. Then I move my shaped loaves within for their final proofing.
Dough hydration
Don’t let the big word scare you, dough hydration isn’t as intimidating as it sounds. It is referring to how much liquid went into your dough. The hydration is impacted by the flour you use (some flour is thirstier than others) and how much water you add. Not enough water and this can produce a thicker crust.
The more you make bread, pay attention to your outcomes. You’ll begin to sense when a dough is just right, and when you’ve over added flour. Your dough should be slightly tacky, but not sticky. And it should pass the windowpane test after you’ve kneaded it. I will test it by touching it with my clean finger. If some comes off, no big deal, but if my finger is covered and when I pull away it stretches like melted cheese it isn’t done yet, more flour is needed.
Oven temperature
Too hot an oven, or a lack of humidity, can also cause a thick or tough crust. Best way to monitor your oven temperature is through a thermometer. If you suspect humidity is the issue, try sticking a dish with 1/2 in to 1 in of water in it inside the oven as well. This will produce a steaming affect and should prevent the crust from being tough.
My loaf is flat and the bubbles inside are random and irregular. What happened?
It sounds like your bread was over-proofed, that is, fermented too long. Watch your dough closely as it proofs. You can check it by gently pressing on it with your finger- if the dough bounces back immediately it’s underproofed: not ready. Underproofed dough is also really dense, no jiggle.
If the dough is just right, it can be jiggled slightly without losing height. It should look airy. It should also have risen 1 1/2 to 2 times in size.
If it’s overproofed, it will deflate and sag when poked. Losing height and spreading out when shaping. There will be lots of bubbles at the surface.

In sum…
I hope this guide has given you answers when it comes to troubleshooting sourdough in your kitchen. If you’re looking to start your own sourdough from scratch check out my post here!
Be sure to drop a comment if I didn’t touch on YOUR question! And don’t forget to pin this post for later. 😉