How to Make Your Own Hand Embroidered Sweater!
In this post I’m going to show you how to make your own hand embroidered sweater. It’s so easy, it’s relaxing, and best of all it up-cycles a sweater into an heirloom. We’re going to breakdown what supplies you need, choosing a design, how to actually embroider the sweater (no stitch stabilizer necessary!), and what kind of time commitment you need. This will make the cutest baby shower or first birthday gift, there’s so many ways you can use this skill!
This post may contain affiliate links, as an Amazon Associate I earn from qualifying purchases.
To start, you’re going to need a sweater.
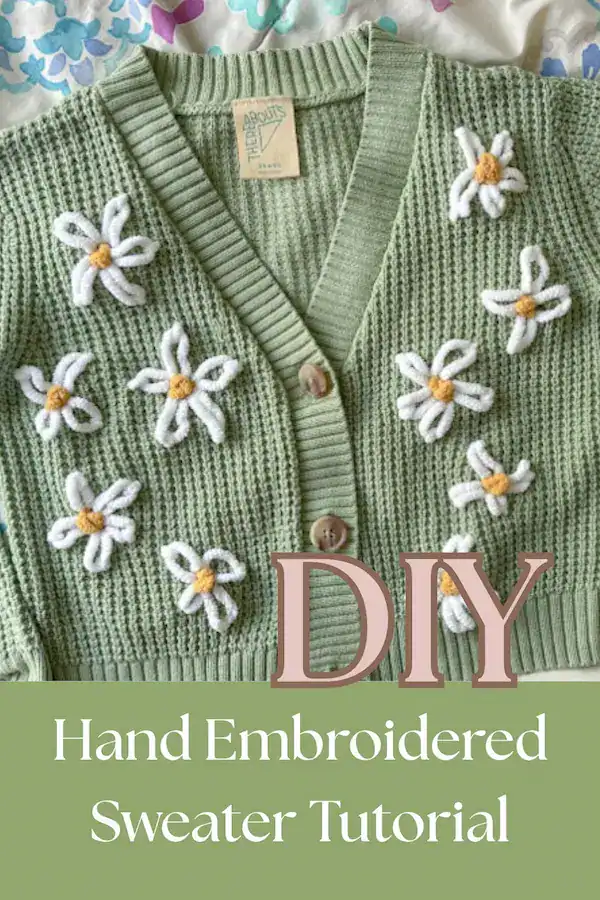
I thrifted this sage green button-up knit sweater for $2. It did come with a few stains, I couldn’t get them out. Sometimes you can strategically place stitches to cover it up, but in this case the stains are in an inconvenient place. Nevertheless, it’s hardly noticeable.
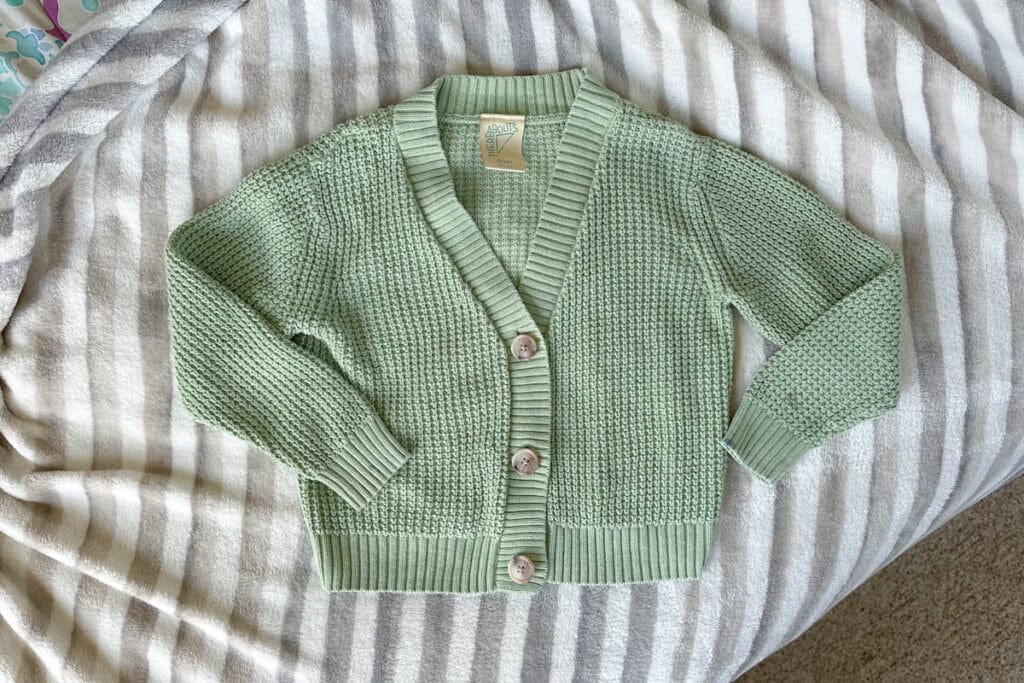
If making one for a child, I recommend purchasing a knit sweater like this. If you’re looking to embroider something for yourself, I’d look at something like this instead. Why a knit sweater? Knit sweaters are the easiest, in my opinion, for a beginner project. They’re especially forgiving!
You’re also going to need:
- yarn, colors according to your design and color of the sweater
- a yarn needle (I use a steel one)
- scissors
- air or water soluble pen
Choosing a design for your hand embroidered sweater…
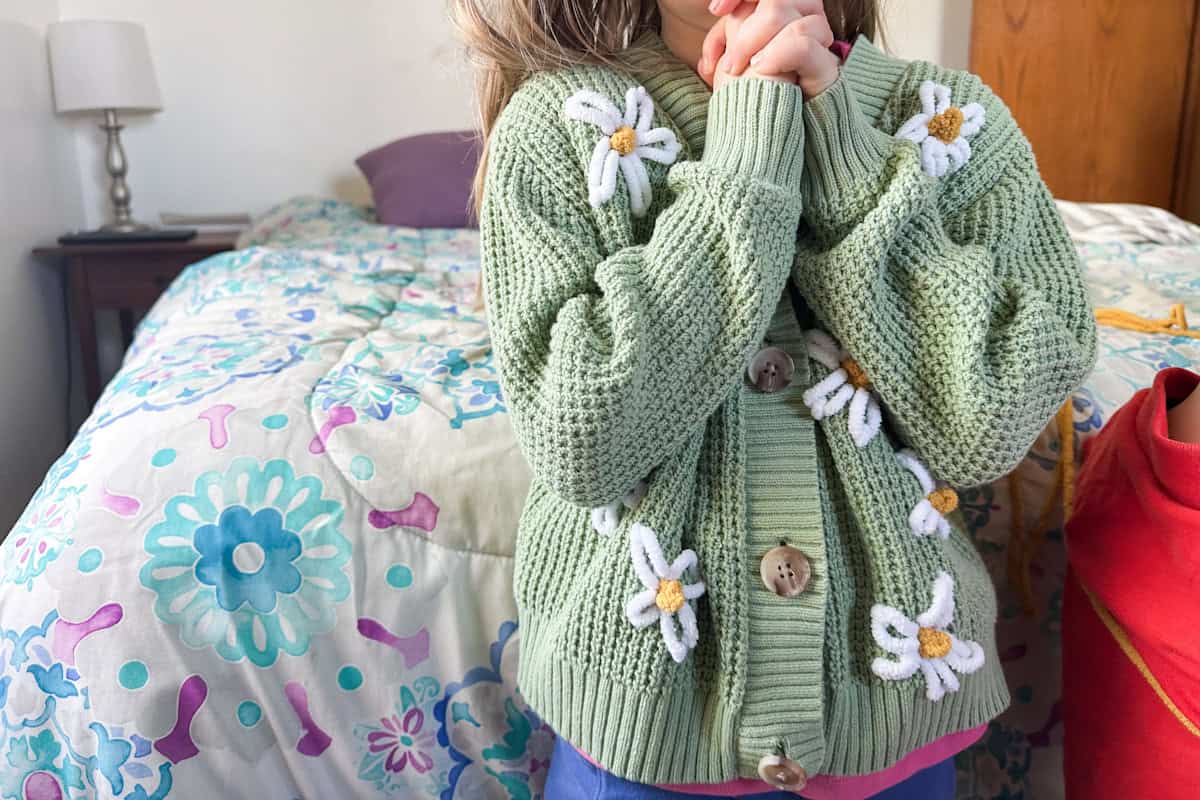
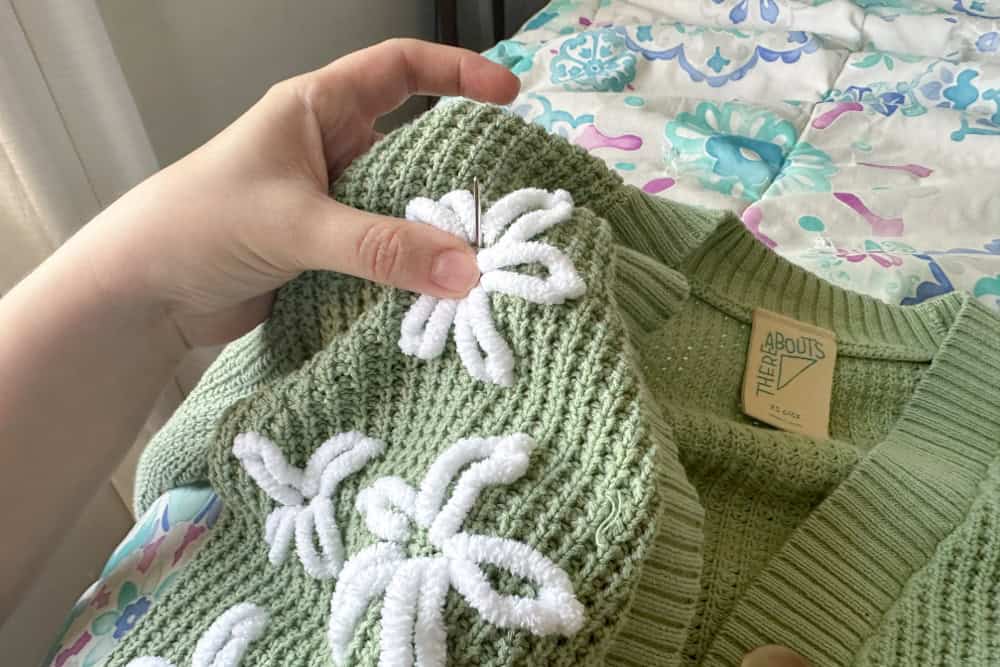
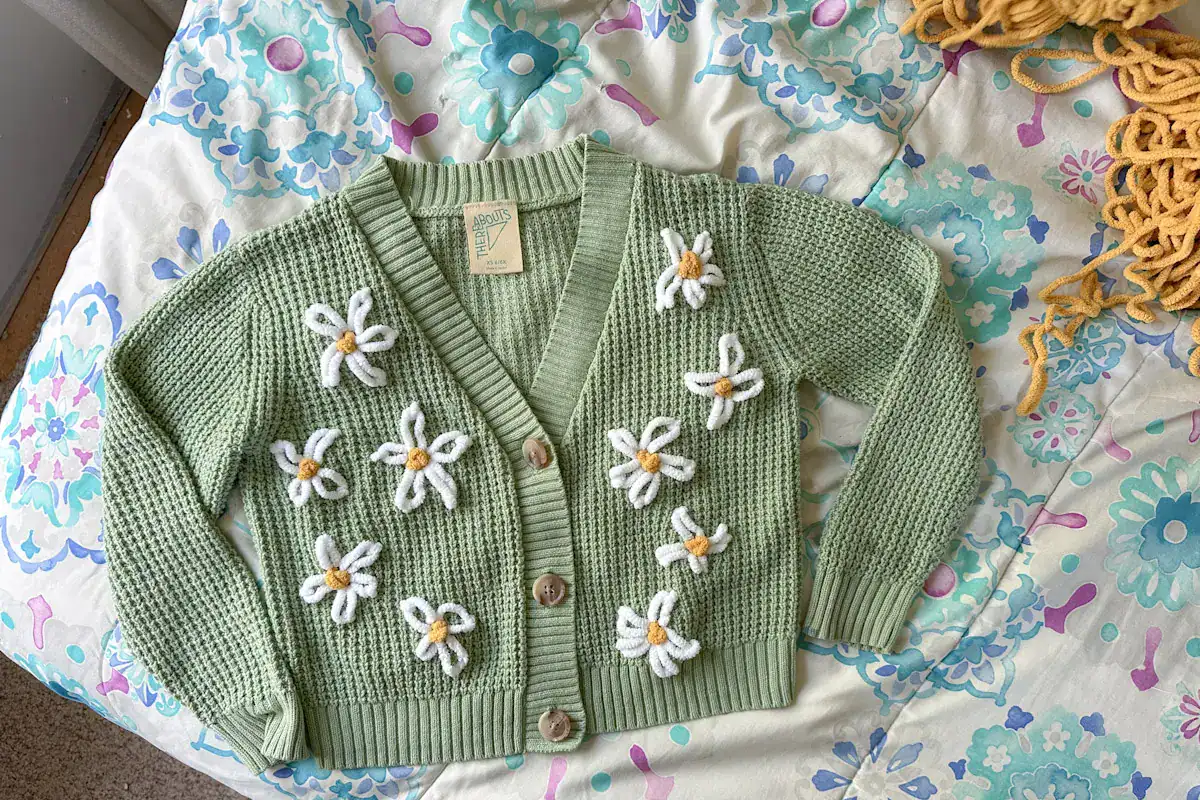
This button-up will be for my daughter, and she requested I sew flowers onto it. Taking into consideration the style of this sweater I chose daisies, as I think the colors will compliment the sweater. A hand embroidered sweater with lettering will probably take longer, but don’t let the time investment deter you! Personalizing a sweater with a nickname or initial can be the sweetest touch. I’ve also seen moms copy their children’s handwriting to embroider on a sweater for their dads/grandparents/etc.
Here’s the step-by-step plan:
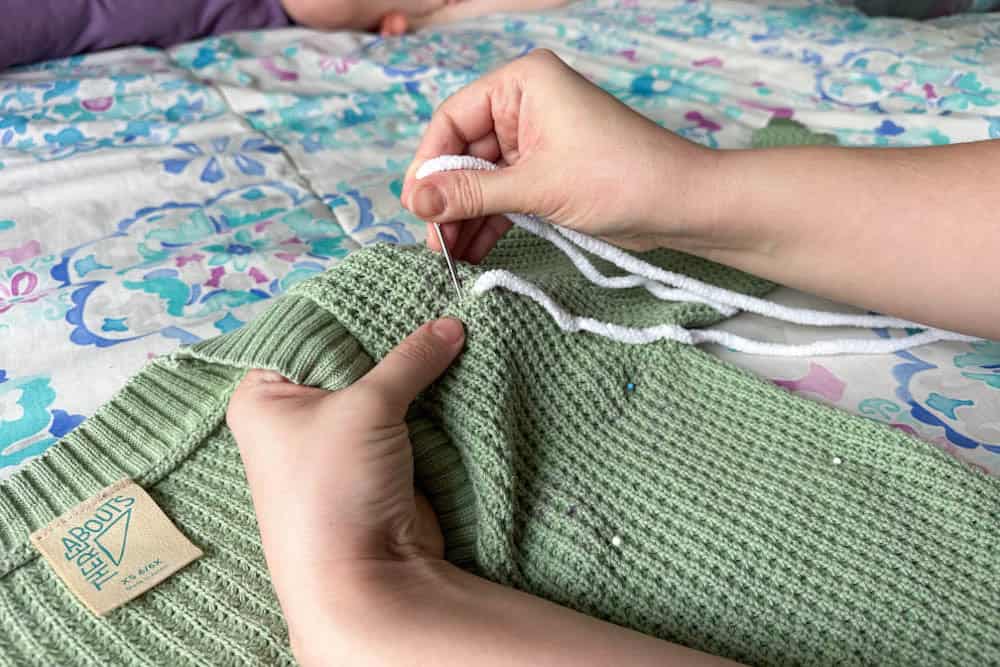
- I used pins to mark out where I wanted my daisies and removed them as I went. I started with a purple air soluble pen but it didn’t want to show up well.
- Stitch the petals using a lazy daisy stitch, with white yarn. I tried to alternate the sizes and the number of petals. I settled on five daisies per side.
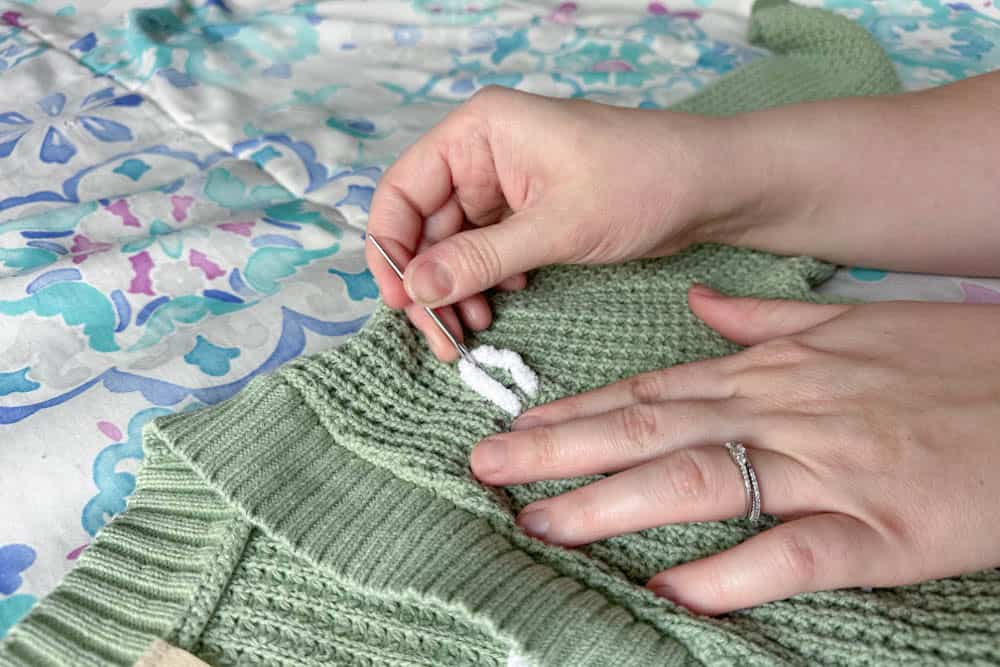
- Fill in the centers with a three twist french knot, using a mustard yellow.
- Secure all yarn and tie off.
Super simple, yes?
Learning the stitches and finishing off your yarn…
If you’re familiar with hand embroidery, this is extra easy. But if you’re not, never fear I have a post coming soon to make it simple. Knit sweaters or fabric in general can be fairly forgiving. I don’t use a hoop or stabilizer on knit sweaters because I prefer to adjust the yarn as I go to make sure it isn’t pulling too tight. It requires patience and moving slow, but I’m pleased with the end result.
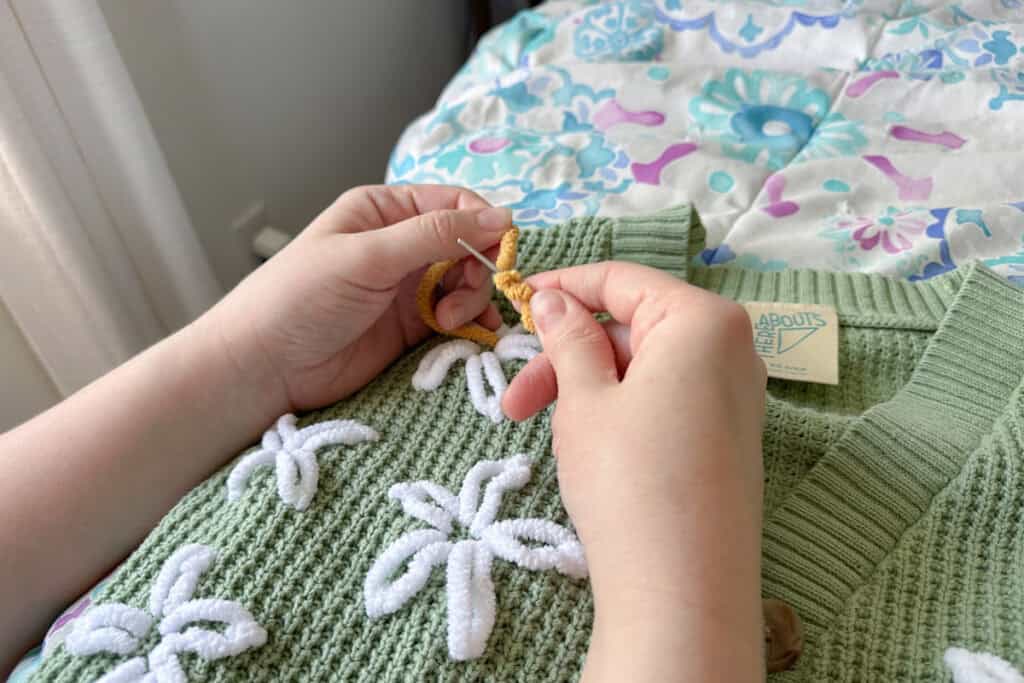
The stitches I used on this sweater are simple, especially sized up from embroidery floss to yarn. We’re only using two stitches for this design, the lazy daisy and french knots. The lazy daisy is done as follows.
Lazy Daisy Stitch
Come up at the base of where you want your first petal to be, pulling your yarn all the way through and putting your needle back through the sweater right beside where you came up (left pic)– but do not pull the yarn all the way through. Keep a loop the size that you want your petal to be! Holding this loop down with your finger, bring your needle back up through the sweater at the top of your petal (middle pic) and secure it into place with a stitch (right pic). Repeat this process for as many petals as you’d like, keeping a small circle in the center for your french knot.
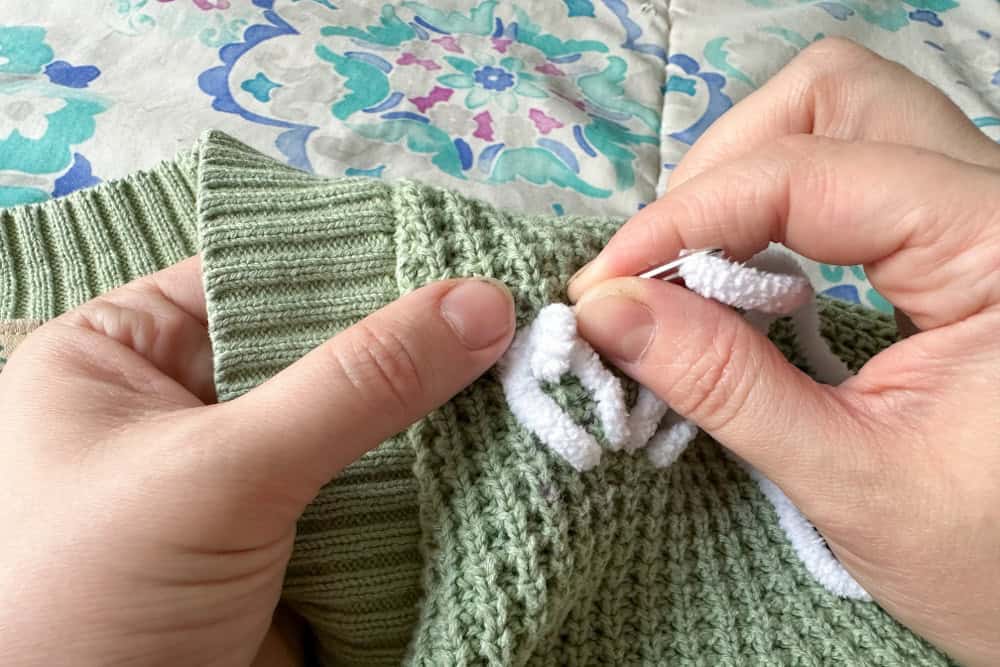
Securing your yarn.
Eventually, you run out of yarn and need to cut more. To secure your yarn into place, I like to weave it into the surrounding stitches then knot it. If you want a really clean back, secure and knot your yarn with each flower. As this will be worn with a dress or shirt underneath, I’m not worried about the yarn rubbing against her.
I personally worked at completing all my flowers before adding the french knots.
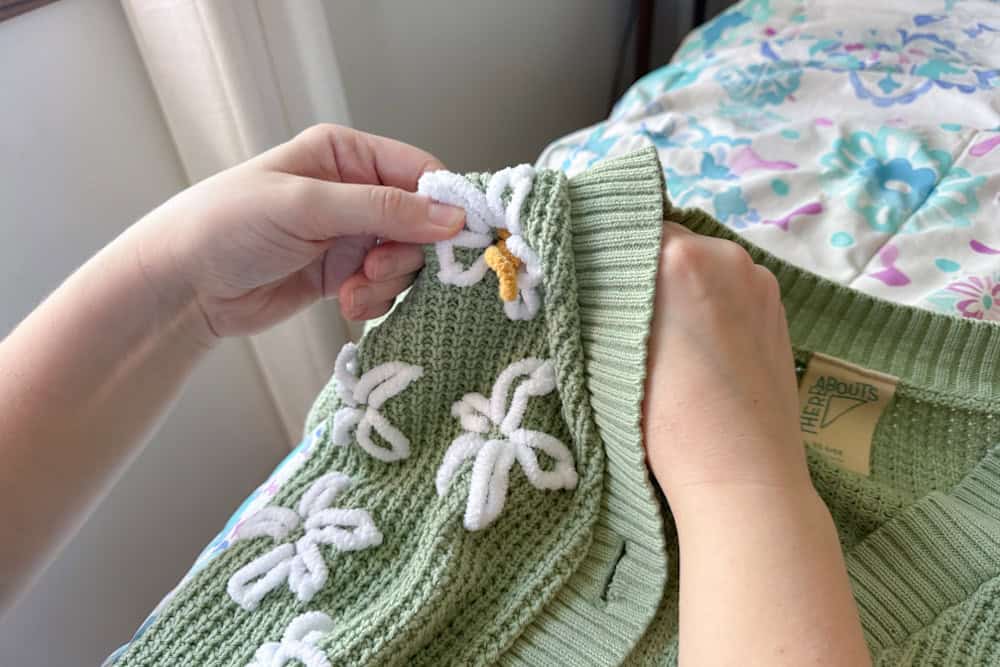
The French Knot
Truly, this is the perfect way to fill in those flower centers! Bring up your needle to the side of your flower center (left pic), twist the yarn around your needle three times (middle pic) and gently hold tension as you put your needle back down in the middle of the center and pull through (right pic). If you’re new to french knots, go slowly and start with an arm length of yarn. If it knots up too early, cut your yarn and try again.
How long does it take to make a hand embroidered sweater?
Depending on the intricacies of your design, it could take an afternoon or it may take longer. I prefer to pick this up in the evenings when my littles are in bed and I can focus. The first hand embroidered sweater I made only took a few nights of focused work. This button up I completed in a few hours, due to it’s simple design.
If wanting to make a hand embroidered sweater as a gift, I highly recommend starting well ahead of time. This isn’t a project you can rush. You need to take your time with your stitches, making sure the yarn isn’t bring pulled too tight, and especially if curves or lettering are a part of your design, slow and steady is the way!
Now it’s time to make your own hand embroidered sweater!
I can’t wait to see what you make! Check out my Pinterest board for other ideas for hand embroidered clothing. There are ideas for hats, sweaters, jeans, and more! Also, if you want to learn more about hand embroidery, stay tuned. I’ve got a free stitch sampler pattern I’m testing and filming. Join our newsletter community to be the first to know when it drops!